

We had the most fun science day with just a few ingredients from the kitchen cupboard. I have to confess, I am impatient and like no mess, no fuss, quick and easy experiments with ingredients you can find in your home. The moment you mention something you have to go to some special store to find you loose me… move on thank you!
Corrie jr. (8) LOVES science experiments so we decided to skip one crafts day and make it a science day. These are the things we made:
1.Kinetic Sand
Kinetic sand is a fun sensory activity that allows you to mould sand like clay. After a while, the mould will loose its shape due to the kinetic properties of the sand.
For this recipe you’ll need:
- 2,5 cups sand
- 3/4 cup corn starch
- 1/4 teaspoon dishwashing liquid
- 1/2 cup water
- 1/2 teaspoon Tea Tree Oil
Mix sand and corn starch and add a mix of the water and dishwashing liquid. Add Tea Tree Oil to make it anti-bacterial (believe me you don’t want to skip this step due to the terrible smell of the corn starch- and wet sand- mix). Store in a sealed container and enjoy!

We made a big batch because we are always on the lookout for good products to sell for entrepreneurship. Kinetic sand is really expensive in the shops, so since this recipe works out so cheap we put some in containers to sell.
After they made and played with the kinetic sand, we talked a bit about the interesting difference between Potential and Kinetic energy and watced this informative cartoon that describes it well
2. Diffusion

Heres a fun experiment to show the movement of water between glasses to explain diffusion in a very creative and visual way. I have to admit that I got a bit hasty and helped the water on… you’ll need a few hours for the water to travel properly between the glasses.
Just take a long piece of paper towel, roll it up and insert the same piece over three glasses with different colored water.
After the experiment we took out the paper towel and left it on the grass to dry. They liked it so much that we put more rolled paper towel in the leftover glasses to make weird looking snake skins!
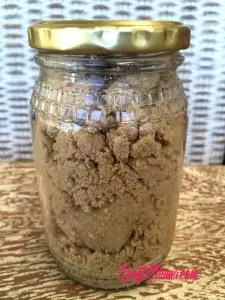
3. Overnight Crystals

Crystals are not easy to make and inevitably sometimes fail. The best way to do it is to make it at night and leave undisturbed overnight but of course we did not have time for that so just made it in the day and it worked anyway. All you have to do is:
- Heat 1 cup of water in the microwave for 45 seconds only- you don’t want to overheat it
- Mix with 1 cup of Epsom Salts and a few drops of food coloring
- Stir for about 3 minutes
- Last but not least, add a few grains of sand- this impurity stimulates crystal growth
- Put the jar in the back of your refrigerator overnight (more than a day will yield better crystals- I left mine 3 days)
- Pour out extra liquid and put back in the refrigerator to seal properly or gently remove excess water with a paper towel
Now you can inspect your crystals with a magnifying glass… easy as that!
4. Magic Cosmic Milk

This activity is so much fun and so, so easy… I may do this for myself to relax even when the kids are not here! The movement of the colors in the milk is mesmerizing and actually makes you feel dizzy if you stare long enough. This baffles me… I have no idea why it does this and I would love for someone to explain!
I enjoyed it so much that I made a video, watch it here!
Disclosure: This post may contain affiliate links. This means that if you purchase something from the site after clicking over from KraftiMama I receive a small percentage of the sale. However, I will sincerely promote only brands that I love. Clicking through these links does not cost you any more than you’d already be spending but you will be helping me out by going through here… thanks a bunch!

okie dokes… I remember learning about this in Biochemistry about 537 years ago 😛 We didn’t do this fun experiment, but we did learn about the “chemistry” of it. Now, as a mum, I actually have use for what I learnt in University…
So lets start with the “job” of the dishwashing soap. It is structured such that it has a part that likes water (non-polar / hydrophilic) and a part that doesn’t (polar / hydrophobic), so that part likes fat instead.
When using it to wash dishes, this structure arranges the grime and fat into little globules called micelles within a “soap ball” (tiny molecular level). so kind of like a filled donut. centre of fat, surrounded by the fat loving part and then the water loving part… making it then easier to rinse off.
Milk is made up with water proteins and FAT!!.
So after adding the food colouring, when we add the soap, the water loving part enjoys itself in the water, and the water fearing part starts to “chase or seek out the fat in the milk. This molecular catching game creates movement in the milk, causing the food colouring to move around.
Once all the soap finds some fat to encapsulate, the movement stops. If there’s more fat, and you add more soap it starts again.
Obviously using full cream vs. fat free would give you more action.
Hope this is understandable….
Much Love
Yash
Wow that is absolutely amazing. Well done on explaining it on a level even I can understand lol! Thank you so much, I will update the post soon. You’re a star!
Thank you very much its only a pleasure. I take pride in being able to “splain-a-nate” things … except why you need to wear socks in winter… I cant seem to get that one through to the kids…
Ha ha ha I have the same problem ?